Homeowners often spot a fallen paint chip and assume a quick dab of emulsion is the solution. My experience restoring heritage interiors suggests otherwise. Simply covering a gap without addressing the cause leads to further failure. Adhesion loss usually signals a deeper conflict between the coating and the substrate. At Plasterers Durham, we focus on stabilising the foundation before any new pigment is applied. This ensures the restoration lasts for years rather than weeks.
The timeframe for your project depends on the moisture content of the masonry. A standard room requires roughly four hours of active physical prep. You must wait at least a full day for sealers to penetrate the pores. Variations in the timeline occur due to ventilation levels and previous paint chemistry. You should also account for the curing period of specialised primers. This creates a reliable bond for the final decorative layers. Plasterers Durham provides the expertise needed to navigate these technical drying stages.
Diagnosing Your Peeling Plaster: Identifying the Cause of Failure
Before any tools for fixing peeled paint are utilised, a technician evaluates the wall health. Skipping this step is why many DIY projects fail within months. I recall a project where a homeowner sanded through distemper without realising it was water-sensitive. You should allocate thirty minutes for a site-wide inspection. We check for efflorescence and evaluate the plaster density. This determines if the surface needs a simple repair or a deeper intervention.
Evaluate the Extent of Delamination
Specialist teams use more than just a visual check. They utilise a perimeter tap test to find hollow spots. Expect a ten-minute assessment of the lath and plaster stability. This guarantees that all unstable material is removed before the restoration begins.
Also Read: How to Fix Small Imperfections After Plastering
Manual Scraping versus Chemical Stripping
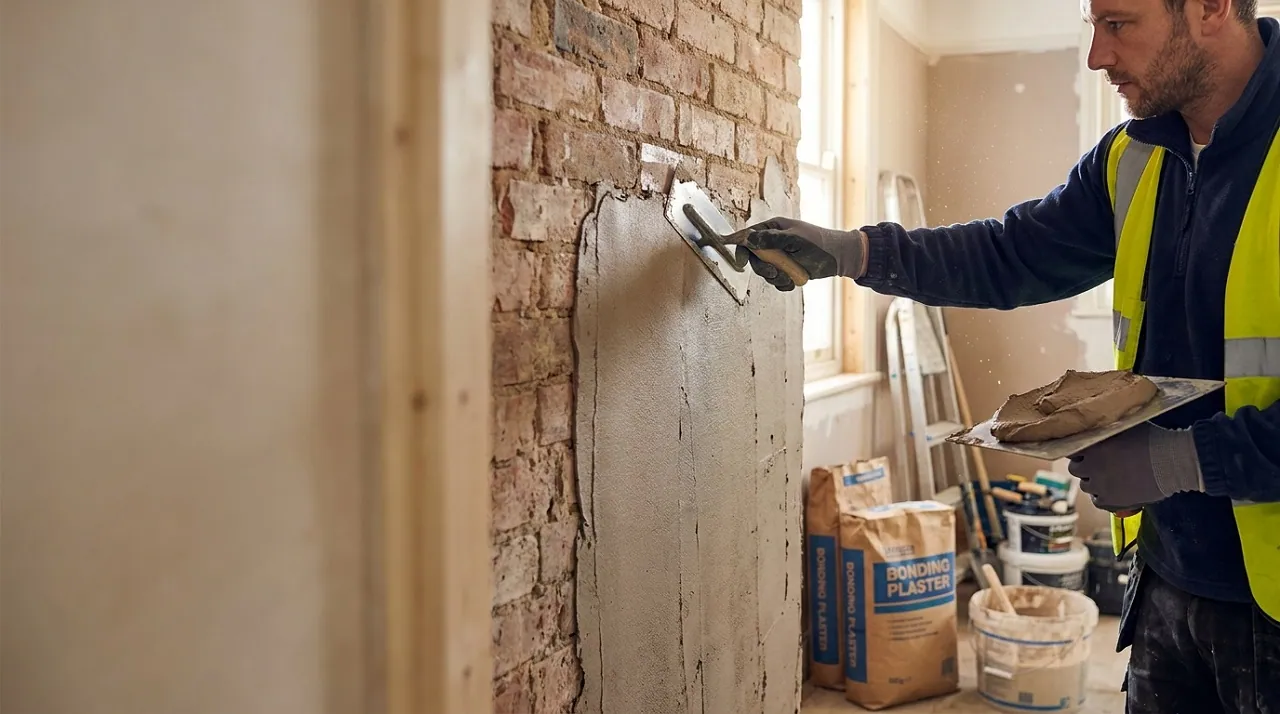
If the paint is brittle, a rigid blade is the best tool. However, if the layers are elastic, different techniques are required. Most Plasterers Durham experts use a precise angle to lift the paint film. This reveals a sound substrate without damaging the delicate plaster underneath.
Hydration Levels and Dew Point Checks
If the flaking occurs near external walls, thermal bridging might be the culprit. High humidity weakens the bond of modern emulsions. This method identifies if a structural leak is feeding the moisture. We find that utilising digital moisture meters is essential for a permanent fix.
Booking Expert Plaster Stabilisation Services
High-quality trade professionals in the North East are often in high demand. Reputable firms usually have a lead time of several weeks. If a contractor offers an instant start, verify their trade accreditation. You need a partner with public liability insurance to protect your property.
Scraping and Sanding: Removing Loose Paint from Plaster
The rhythm of the work shifts once the floor protection is secured. The first hour involves removing every loose fragment from the area. The specialist is “feathering” the edges of the failure to create a smooth transition. This prevents the new paint from highlighting old gaps. By the second hour, the virgin plaster is usually visible. This allows for a direct assessment of the surface porosity.
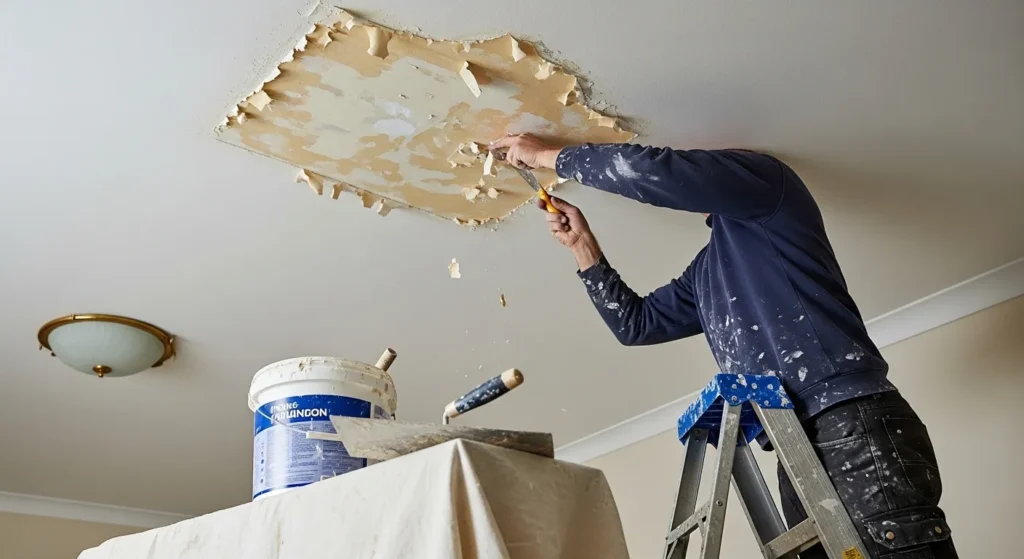
After the loose debris is cleared, the focus turns to the microscopic particles. We must eliminate chalky residue to ensure a chemical bond. At Plasterers Durham, we target a dust-free environment during this critical stage. This stops any future blistering from ruining the final aesthetic. The work is intensive but creates the necessary base for a high-end finish. Your ceilings will regain their structural and visual integrity.
Estimated Timelines for Fixing Peeled Paint Surfaces
- Manual Scraping and Edging: This typically involves two hours of focused physical effort.
- Applying Stabilisation Primers: Expect a forty-minute application window followed by a long dry.
- Patch Filling and Levelling: This takes roughly ninety minutes per section for a flush finish.
- Base Coating the Repair: If you are finishing the room, allow one hour for the first pass.
The exact schedule relies on the humidity levels within your home. Traditional lime-based plaster reacts differently to modern primers than gypsum does. You should clear the workspace of all personal items before the arrival of the team. This prevents delays caused by limited movement around the room. An expert how to fix peeling paint service requires full access to the ceiling. This allows the specialist to work efficiently and safely.
Applying Primer and Filler: Stabilising the Plaster Substrate
The process is far from over when the wall looks even. It concludes only when the alkali levels are neutralised. The sealing stage requires a period of deep saturation. I have seen many repairs fail because surface dust acted as a barrier. This leads to the paint “peeling” away in large sheets.
Selection of Appropriate Bonding Primers
We choose between solvent-based sealers and water-borne primers. This choice depends on the suction rate of the exposed plaster.
Flush Levelling and Sanding Techniques
A vital stage where we match the coating thickness across the wall. We ensure the filler does not create a raised patch.
Particulate Control and Surface Cleaning
We clear the area using tack cloths and industrial vacuums. This ensures no grit remains to ruin the paint application.
Adhesion Validation and Final Inspection
A quick check confirms the new layers are fully attached. This ensures your home is no longer at risk of falling debris.
Conclusion: Ensuring a Long-Lasting Smooth Plaster Finish
Learning how to fix peeling paint involves more than just a brush. It is a technical property maintenance task that demands patience. When managed by Plasterers Durham, it avoids the cycle of recurring failure. If you contact a professional today, expect a half-day site visit. My advice is to leave a buffer for fixing peeled paint. You will likely need it to address any unforeseen dampness.
I anticipate that UK Building Codes will soon mandate better ventilation. This will reduce the instances of paint failure in older homes. We might see more integrated sensors in modern plasterwork. This ensures your living space remains healthy and dry for decades. Utilising Plasterers Durham ensures your restoration aligns with these high standards. Take these steps now to keep your property in peak condition.
Frequently Asked Questions
What Causes Paint to Peel from A Plaster Ceiling?
Failure usually stems from moisture infiltration or poor surface preparation. If the original mist coat was skipped, the paint sits on the surface rather than soaking in. Over time, gravity and humidity pull the layer away from the plaster. Understanding how to fix peeling paint requires identifying if the problem is environmental or structural.
Should I Use A Scraper or Sandpaper to Fix Flaking Paint?
You must use both for a professional result. A sharp scraper removes the bulk of the loose material quickly. Sandpaper is then used to feather the edges of the remaining paint. This creates a sloped transition that is invisible under a new coat. Plasterers Durham recommends a fine-grit paper to avoid gouging the soft plaster substrate.
Do I Need A Special Primer for Old Plaster Walls?
Yes, an alkali-resisting primer is essential for traditional plaster. Old walls can be chemically active, which destroys the bond of standard emulsions. A stabilising solution binds any loose, powdery particles into a solid base. This provides the necessary “key” for fixing peeled paint successfully and permanently.
Can A Leak from Above Cause Peeling Paint?
A water leak is the most common cause of ceiling failure. Water travels through the plaster and pools behind the paint film. This causes the paint to stretch and eventually burst or flake. You must fix the source of the water before attempting any how to fix peeling paint procedures. Otherwise, the new repair will fail immediately.
How Do I Stop My Bathroom Paint from Peeling?
The bathroom is a high-moisture zone that requires vapour-permeable paint. If you use a non-breathable coating, moisture gets trapped behind it. This leads to blistering and eventually peeling. Ensure you have adequate extractor fans and use a primer specifically designed for wet areas. This significantly reduces the need for frequent repairs.