Expanding foam turns up on building sites and in DIY tool kits all over Durham and across the rest of the UK. It fills gaps around window frames, seals voids left by plumbers, packs out cable chases in solid walls, and sets solid in minutes. It’s genuinely useful. But when someone asks whether you can plaster straight over it that’s where the answer needs a bit more nuance.
The short answer is yes, technically. The more useful answer is that it’s rarely the right approach, and it needs to be done carefully to have any chance of lasting. If you get it wrong, you end up with cracked or fallen plaster weeks later and the job to do all over again.
Is It Worth Plastering Over Expanding Foam at All?
Before reaching for the bonding coat, it’s worth asking whether plastering over the foam is actually the best approach for your situation or whether the foam needs to come out first.
For small gaps and minor repairs, plastering over foam is a legitimate technique. For larger areas, or anywhere the foam is structural (holding a window frame in position, for instance), the decision becomes more complicated. And for ceilings or party walls with fire protection requirements, expanding foam is generally not an appropriate material regardless of how well it’s plastered over.
If you’re in Durham or the surrounding areas and you’re not sure which side of that line your job falls on, a quick conversation with an experienced plasterer will save you time and money.
Why Plastering Over Expanding Foam Is Tricky
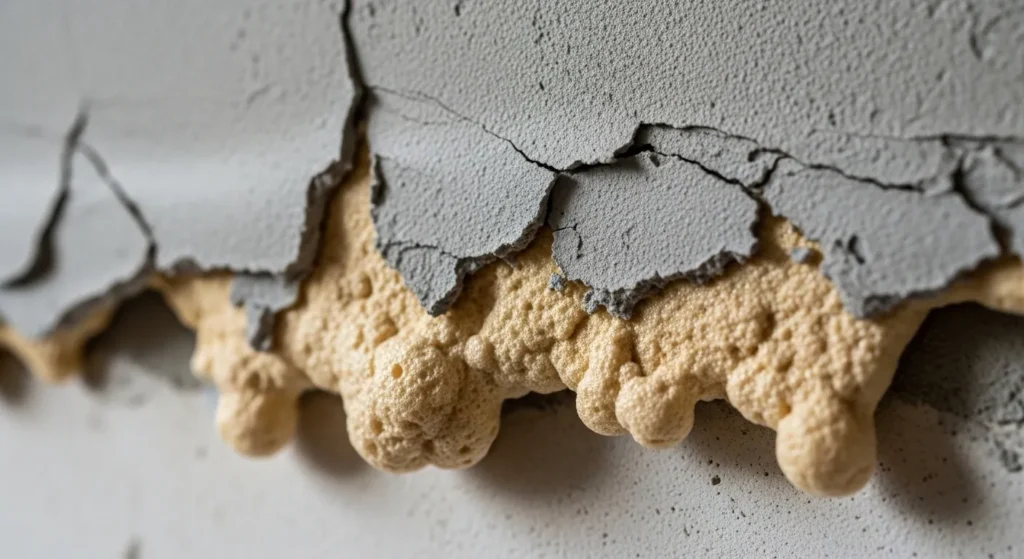
Expanding foam is a polyurethane-based product. Once it’s cured, the surface is closed and smooth not ideal conditions for plaster adhesion. On most surfaces (brick, plasterboard, concrete), plaster relies on a combination of mechanical grip and suction. Cured expanding foam offers very little of either.
There’s a structural concern too. Plaster over a large area of foam forms a shell over a compressible, slightly flexible material. Any impact a knock from a hoover, a chair back, a child running past can crack or dislodge that shell. The foam underneath provides almost no resistance.
It’s also worth understanding what expanding foam actually is before working with it. Fast Build Supplies’ guide on when and where to use expanding foam explains how the material bonds to different substrates and why surface preparation matters so much — useful background reading before you start any repair job.
In older Durham terraces, Victorian semis, and stone-built County Durham properties, it’s particularly common to find expanding foam around window frames where they’ve been replaced at some point. Window fitters sometimes use foam generously to fill draughty gaps and hold the frame in place then leave the plasterer to deal with an uneven, multi-plane surface that’s often too proud and in the wrong plane entirely.
When Can You Plaster Over Expanding Foam?
Smaller areas generally less than 20mm in width are where plastering over foam becomes more feasible. In practice, this might be a gap where pipes exit a wall, a small cable chase, or a narrow void around pipework in a bathroom or kitchen.
In these situations, the foam must first be recessed back at least 10mm below the surrounding plaster surface. Skimming over foam that’s flush or proud won’t work the plaster has nothing to grip and nowhere to go. Once recessed, experienced plasterers in Durham typically apply a backing coat (usually British Gypsum Bonding Coat) pressed firmly into the recess and left to fully cure. The surface is then scraped flat or slightly concave, and a fine-fill finishing plaster such as Easifil or Multi Finish is applied to bring the level up. Done properly, this produces a clean, solid result for smaller repairs.
When Should You Not Plaster Over Expanding Foam?
For any area larger than roughly 20mm, plastering directly over expanding foam carries a real risk of failure. Cracking, loss of adhesion, or sections of plaster coming away entirely particularly in areas that receive physical contact or vibration are all distinct possibilities.
In these cases, the foam should come out and a proper substrate installed. For holes in plasterboard partitions or ceilings, the correct approach is to cut the area back cleanly, fit a new section of plasterboard, and plaster over that. For gaps in solid wall common in older County Durham properties sand and cement followed by bonding plaster gives a far more reliable result.
Fire protection is another consideration that doesn’t get mentioned enough. Expanding foam lacks fire resistance. If you’re filling holes in ceilings or walls that serve a fire protection function between floors in a house conversion, around service penetrations through party walls standard expanding foam isn’t appropriate. Fire-rated variants exist but are not a substitute for proper intumescent fire-stopping materials in structural applications. If you’re in any doubt, check with a professional before proceeding.
The Problem with Expanding Foam in Window and Door Reveals
Window reveals are among the most common expanding foam scenarios plasterers across Durham and Chester-Le-Street encounter. When older sash windows, bay windows, or uPVC replacements go in, the fitters often use foam liberally to fill draughty gaps and hold the frame sometimes leaving the foam to set proud of the surrounding plaster surface.
In these situations, removing the foam entirely would typically mean pulling the window out so you work with what’s there. The key is in the preparation: cut the foam back thoroughly so it sits well recessed from the plaster face, use a proper backing coat, and in larger reveals consider expanded metal lath (EML) to provide a substrate the plaster can grip. This is one of those jobs where experience matters more than the specific products you use.
Step-by-Step: How to Plaster Over Expanding Foam (Small Areas)
- Allow the foam to cure completely. This usually takes two to four hours minimum, but leaving it overnight is better practice. Partially cured foam can continue to expand slightly and push through plaster applied too soon.
- Cut and trim the foam back to at least 10mm below the surrounding plaster surface using a Stanley knife or hand saw. This step is essential don’t try to skim over foam that’s flush.
- Score and roughen the exposed foam surface. This improves mechanical adhesion and makes a meaningful difference to how well the backing coat keys in.
- Apply a bonding agent or PVA if recommended for the product you’re using. Check the manufacturer’s guidance.
- Press bonding plaster firmly into the recess. Pack it fully with no air pockets, and leave to set completely before the next coat.
- Once set, scrape flat or slightly concave and apply a thin finish coat of MultiFinish or equivalent, feathering carefully into the surrounding plaster.
- Trowel to a smooth finish and allow to dry fully before decorating.
Common Mistakes to Avoid
Plastering over foam that’s still fresh or only partially cured is probably the most frequent error. The foam can continue expanding slightly and push through the plaster above. Always wait for full cure.
Applying finish plaster directly over foam without a backing coat is another common mistake. Finish plaster is too thin to bridge the surface reliably and lacks the grip needed. Always use bonding coat first, let it set, then apply the finish.
Applying too thick a coat in one goes over a foam base is also problematic. Multiple thin coats are more reliable than a single heavy one. And assuming the foam provides structural support it doesn’t. For any area likely to receive impact, you need a rigid substrate.
When It’s Better to Call a Plasterer in Durham
If you’re dealing with a large section of expanding foam, an uneven window reveals in an older property, a ceiling repair where fire protection might be relevant, or a mixed substrate situation lath and plaster walls, stone, or different depths of existing plaster it’s usually worth bringing in an experienced professional rather than attempting it yourself.
An experienced plasterer will assess whether the foam needs to come out, whether EML is required, and which backing product is appropriate for the specific substrate. That assessment takes fifteen minutes but can save hours of rectification later.
Plasterers Durham cover Durham city, Chester-Le-Street, Stanley, Consett, Spennymoor, Newton Aycliffe, Seaham, and surrounding areas across County Durham. We work in all types of properties Victorian terraces, stone farmhouses, modern builds, and everything in between.
Frequently Asked Questions
Will Plaster Stick to Expanding Foam?
Plaster will adhere to cured expanding foam in small, well-prepared areas but it doesn’t bond naturally or strongly to the foam surface. Proper preparation (recessing the foam, roughening it, applying a bonding coat) is essential. For larger areas, plastering directly over foam is not reliable.
Can You Skim Over Expanding Foam?
A direct skim coat over expanding foam isn’t advisable without bonding plaster underneath. Finish plaster is too thin to bridge the surface reliably. Always apply bonding coat first, let it fully set, then skim. Learn more about our skimming services in Durham.
How Do You Prepare Expanding Foam for Plastering?
Recess the foam at least 10mm below the plaster surface, score it to improve adhesion, apply bonding plaster pressed firmly into the recess, allow it to set fully, then apply finish plaster. For larger areas, install expanded metal lath over the foam before the bonding coat.
What Type of Plaster Do You Use Over Expanding Foam?
British Gypsum Bonding Coat is the standard choice for the first coat. Follow with a finish plaster MultiFinish or a fine-fill filler such as Easifil for the surface layer. Don’t apply finish plaster directly to foam without bonding coat underneath.
Can Expanding Foam Replace Plaster?
No. Expanding foam is a gap filler and insulation product it’s not a substitute for plaster. It lacks structural properties, fire resistance, and the smooth finish characteristics of plaster. It should only be used as a preparatory base material in specific, limited circumstances.
Should I Remove Expanding Foam Before Plastering?
For anything more than a small repair generally above 20mm yes. Removing the foam and fitting a proper substrate (plasterboard or sand and cement) will give a far better result. For small gaps under 20mm, careful preparation and a backing coat can produce a satisfactory finish without full removal.
How Much Does It Cost to Have a Plasterer Repair Expanding Foam Damage in Durham?
For small patch repairs around pipes or cable chases, costs are typically modest a local plasterer in Durham might charge £60 to £150 for a small repair visit, depending on access and complexity. Larger window reveals work or full room sections will vary based on size. It’s always worth getting a written quote before work starts.