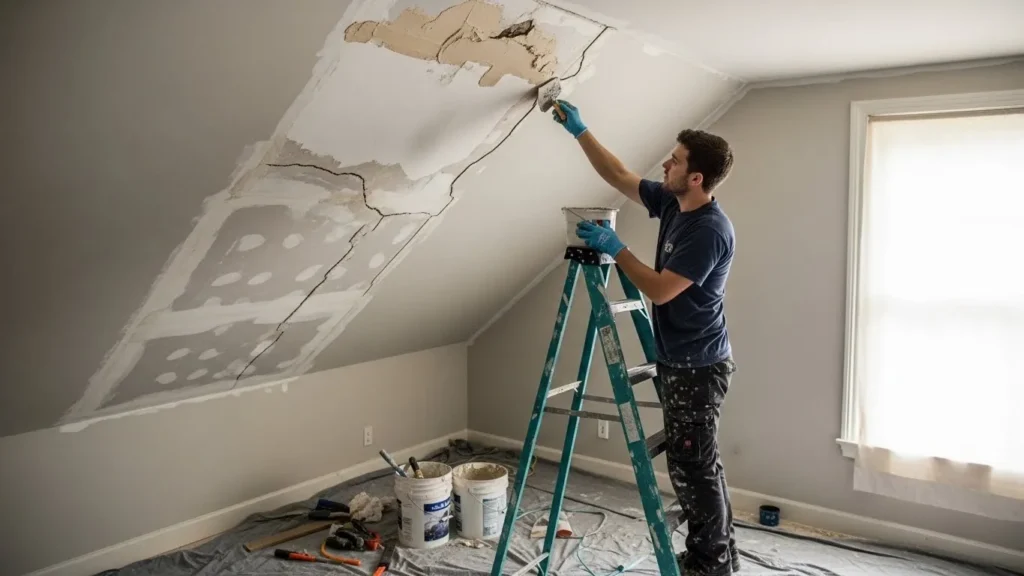
Water damaged plaster ceilings present one of the most challenging repair tasks Durham homeowners faces, particularly following roof leaks, burst pipes, or severe weather events. The sagging plaster, peeling paint, brown staining, and potential Mould growth require immediate attention to prevent structural deterioration and health hazards. This comprehensive guide walks you through professional ceiling water damage repair techniques, from initial assessment to final decoration, ensuring your Durham property receives expert restoration without the expense of full replacement.
Identifying Water Damage Signs on Plaster Ceilings
Visible brown or yellow staining represents the most obvious indicator of water damage, appearing as discoloured patches that spread across ceiling surfaces. These stains typically start small near the water source before expanding outward as moisture saturates the plaster and seeps through paint layers. Sagging or bulging sections signal serious damage where plaster has detached from the lath backing, creating dangerous conditions that could lead to ceiling collapse without prompt intervention.
Peeling or bubbling paint suggests trapped moisture beneath the surface, weakening the bond between paint and plaster whilst promoting Mould growth. Soft or crumbling plaster indicates advanced deterioration where the material has lost structural integrity and requires complete removal before repairs commence. Plasterers Durham recommends immediate professional assessment when multiple damage indicators appear simultaneously, as this often reveals extensive hidden problems beyond surface issues.
Essential Tools and Materials for Ceiling Water Damage Repair
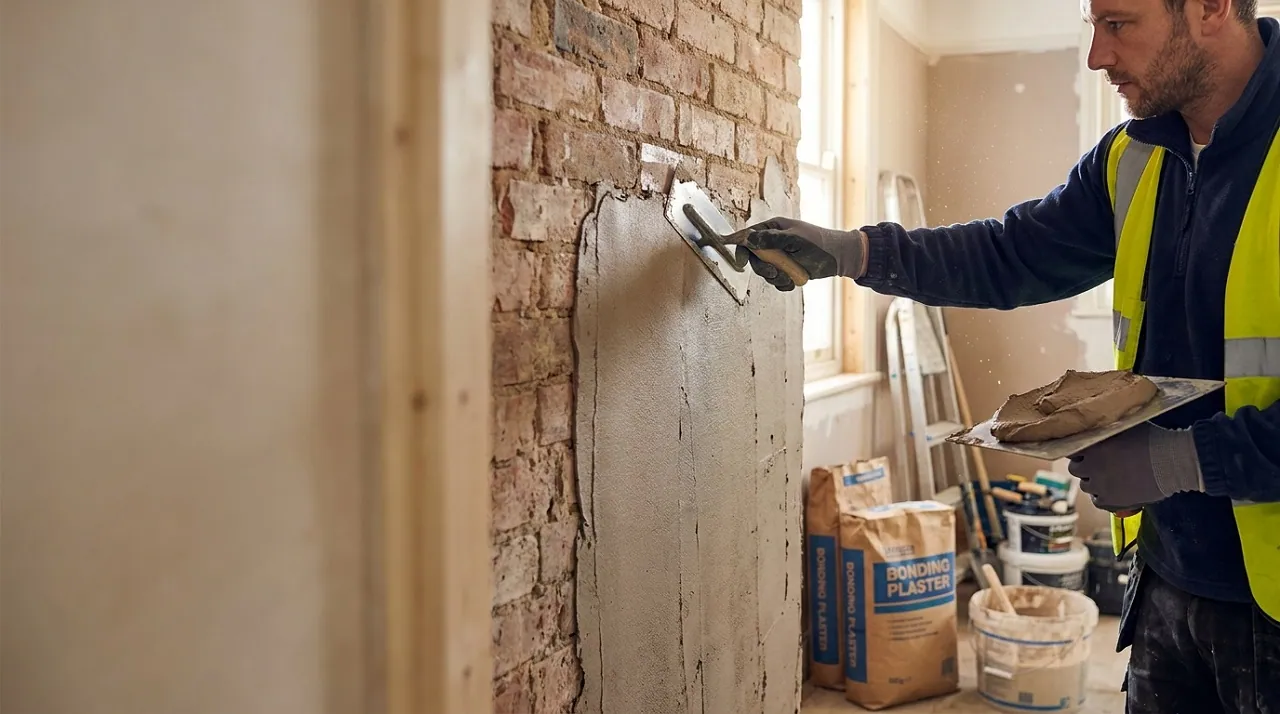
Professional ceiling water damage repair requires specific equipment that ensures safe, effective restoration whilst protecting surrounding areas from dust and debris. Durham homeowners attempting repairs should gather all necessary items before starting work to avoid project delays during critical drying or setting stages.
- Plaster filler or joint compound for filling cracks, holes, and damaged sections
- Putty knives in various sizes including 6-inch, 8 inch, and trowels for application
- Sandpaper in multiple grits from 120 to 240 for smoothing repairs flush with existing surfaces
- Primer sealer specifically formulated to block water stains and prevent bleed through
- Ceiling paint matching existing colour and finish for seamless repair blending
- Reinforcement mesh tape for stabilising cracks and preventing future separation
- Drywall screws and drill for securing loose plaster sections to underlying lath
Safety equipment including dust masks, protective goggles, and drop sheets proves essential when working overhead with materials that create airborne particles. Professional plasterers recommend wearing old clothing and using proper ladder safety practices to prevent falls during ceiling repairs.
How Professionals Handle Water Damaged Plaster Ceiling Repairs
Eliminating the Water Source
The first critical step involves identifying and completely eliminating the water source causing ceiling damage, whether that’s repairing roof tiles, fixing leaking pipes, or addressing drainage problems. Proceeding with repairs before stopping water ingress guarantees repeated damage and wasted restoration efforts.
Removing Damaged Materials
Once the area has thoroughly dried, professionals remove all loose plaster, paint, and compromised materials using putty knives and scrapers. This removal extends outward from the damaged centre until reaching solid, firmly attached plaster that doesn’t move under gentle pressure.
Stabilising and Priming
Exposed lath receives thorough cleaning with wire brushes to remove dust and old plaster residue before bonding agent application. Any loose or sagging plaster sections get secured to the lath using plaster washers and drywall screws to prevent future movement.
What Triggers Water Damage on Plaster Ceilings
Roof leaks represent the leading cause of ceiling water damage in Durham properties, particularly following severe storms, missing tiles, or deteriorating flashing around chimneys and valleys. Even small roof defects allow significant water penetration during prolonged rainfall, gradually saturating insulation and plaster until visible damage appears. Plumbing failures including burst pipes, leaking joints, and failed bathroom seals cause sudden, severe ceiling damage requiring emergency response.
Condensation problems stemming from inadequate ventilation, poor insulation, or high humidity levels create persistent moisture that degrades plaster over extended periods. Cold spots where warm interior air meets cold surfaces promote condensation accumulation, particularly problematic in Durham’s climate during winter months. Overflow from bathrooms, blocked gutters forcing water under roof edges, and failed central heating systems all contribute to ceiling water damage requiring professional plasterer intervention.
Also Read: How to Deal with Bulging Plaster Ceilings
Step by Step Plaster Ceiling Repair Process for Homeowners
Apply the first scratch coat of plaster filler or joint compound to damaged areas using appropriately sized putty knives, forcing material into all gaps and depressions. This initial coat should fill approximately three quarters of the repair depth, allowing subsequent coats to build up gradually for optimal adhesion. Allow 24 hours drying time before proceeding, though quick setting compounds may set within two to four hours under ideal conditions.
- Sand the dried first coat using 120 grit sandpaper until reasonably smooth and flush with surrounding ceiling surfaces
- Apply reinforcement mesh tape over any cracks exceeding 3mm width, embedding the tape in a thin layer of plaster compound
- The second finish coat extends slightly beyond the repair area, feathering edges into the existing ceiling
- After complete drying, sand again using progressively finer 180 and 240 grit sandpaper for smooth surfaces
- Apply anti Mould treatment spray to prevent future fungal growth, particularly important following water damage
Two coats of quality ceiling paint applied with proper roller techniques complete the restoration, matching the surrounding ceiling finish. Professional plasterers in Durham achieve seamless results by carefully blending repair edges into existing surfaces.
Understanding Ceiling Water Damage Repair Costs in Durham
Small Patch Repair Pricing
Small water damaged ceiling repairs covering limited areas typically cost between £150 and £200 in Durham, including materials and labour. These straightforward repairs suit minor damage where plaster remains firmly attached and only surface restoration proves necessary.
Full Ceiling Replacement Costs
Extensive water damage requiring complete ceiling replacement ranges from £400 to £1,000 depending on room size and plaster type. Large rooms can reach £875 for full replacement including labour, materials, and disposal of damaged sections.
Comprehensive Damage Restoration
Complete ceiling water damage repair averaging £1,550 encompasses leak source repair, plasterwork, electrical safety checks, and final decoration. Mould remediation services add £300 to £800 when fungal growth has established following prolonged moisture exposure.
FAQ’s About Fixing Water Damaged Plaster Ceilings in Durham
How Long Does Water Damaged Plaster Take to Dry?
Drying time varies from 24 to 72 hours depending on damage extent, ventilation, and temperature, though deep saturation may require one to two weeks.
Can I Paint Over Water Damaged Ceiling Without Repairs?
No, painting over water damage without proper repairs traps moisture, promotes Mould growth, and allows stains to bleed through new paint.
What Causes Brown Stains on Water Damaged Ceilings?
Brown staining results from dissolved minerals, rust, or organic materials in water mixing with plaster and paint as moisture evaporates.
How Much Does Ceiling Water Damage Repair Cost in Durham?
Small repairs cost £150 to £200, whilst extensive damage averages £1,550 including full restoration, and complete replacement ranges £400 to £1,000.
When Should I Replace Rather Than Repair Water Damaged Ceiling?
Replace ceilings when plaster has completely detached from lath, extensive Mould growth exists, or damage covers more than 30% of surface area.
Can Water Damaged Plaster Ceilings Collapse?
Yes, severely water damaged plaster can collapse when saturated material separates from lath backing, creating dangerous falling debris hazards.
How Do I Prevent Future Ceiling Water Damage?
Regular roof inspections, proper ventilation, prompt leak repairs, and annual gutter maintenance prevent most ceiling water damage in Durham properties.