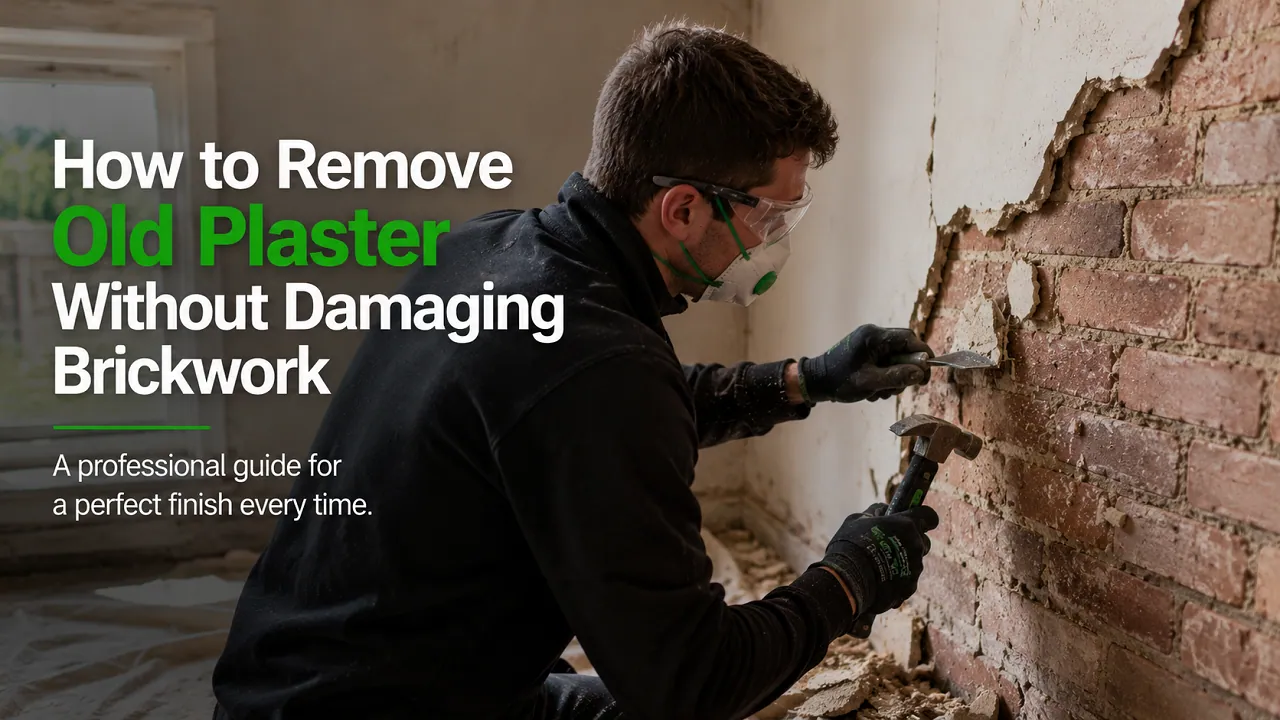
Remove old plaster without damaging the brickwork underneath comes down to three things: the right tools, the correct angle, and patience. A hammer drill with a flat chisel bit held at 30–45 degrees to the wall gives you maximum plaster removal with minimum risk to the brick face. Working from top to bottom in 30cm sections — and never forcing the chisel directly into the surface — is the method Professional Plasterers in Durham use on Victorian and Edwardian properties every week.
Safety Checks Before You Start
Before picking up a chisel, two risks need to be ruled out — asbestos and structural lime mortar failure. Skipping this step is the most common and most expensive mistake homeowners make.
Asbestos Risk
In properties built before 1980 across Durham and the North East, textured coatings — particularly Artex on ceilings and upper walls — may contain chrysotile asbestos fibres. You cannot identify asbestos by sight.
What to Do Before Starting
Chip out a small sample (wet the surface first, wear a P100 respirator, seal in a double zip-lock bag) and send it to a UKAS-accredited testing laboratory. Costs typically run £25–£50 per sample. If asbestos is confirmed, stop work immediately and contact a licensed asbestos removal contractor.
Lime Mortar Risk
In pre-1920 terraced houses — common across Durham neighbourhoods like Gilesgate, Framwellgate Moor, and Belmont — walls were built with lime mortar rather than modern sand-cement. Over decades, the plaster render can become the only thing holding the surface of the brickwork together. Strip it carelessly and you can pull out whole sections of mortar joint or destabilise the face of the brick.
How to Spot a Lime Mortar Wall
Run a nail across a mortar joint. Lime mortar is noticeably softer than sand-cement and will scratch away easily. If your property dates to before 1920, proceed in small sections and inspect every 30cm of exposed brickwork before continuing.
Tools You Need for Plaster Removal
Having the right tools is the difference between clean, controlled removal and a wall covered in chip marks and gouged brickwork.
Removal Tools
- SDS rotary hammer drill — Bosch GSH 3E or DeWalt D25133K with a flat chisel bit (not pointed, which concentrates impact and risks splitting brick faces)
- Bolster chisel — 75mm wide, for working around pipework, sockets, and tight corners
- Stiff putty knife — for clearing loose plaster between chisel passes
Safety Equipment
- P100 half-face respirator — not a paper dust mask; old plaster generates fine silica dust
- Safety goggles — wraparound, not standard glasses
- Heavy-duty work gloves — broken plaster edges are sharp
- Ear defenders — SDS drills at close range exceed 100dB
Cleanup Equipment
- Wire brush — hand-held and drill-mounted, for removing residue from brick faces
- Industrial vacuum with HEPA filter — a domestic vacuum will clog and recirculate fine dust
- Builders’ bags or a skip — a single average room generates 50–150kg of rubble
How to Prepare the Room
Proper preparation takes an hour and saves several hours of cleanup — and prevents damage to floors, woodwork, and anything you cannot remove.
Electrics and Pipework
Isolate the electrics to the room at the consumer unit. Old plaster often conceals surface-run cables chased in at odd angles. Mark the position of all visible sockets, switches, and fittings with masking tape on the floor. Work manually with the bolster chisel within 30cm of any electrical point.
Floor and Furniture Protection
Cover all floors with heavy-duty dust sheets and tape them to the skirting boards. Use two layers — single sheets shift and bunch as you move. Wrap anything you cannot remove in polythene and tape it closed. Fine plaster dust travels far further than most people expect.
Ventilation and Dust Control
Attach a dust extraction shroud to your SDS drill if the model supports it (most modern Bosch and DeWalt SDS drills have shroud attachments available). Open windows, but be aware that plaster dust is dense enough to settle on neighbouring surfaces outside.
Correct Chisel Technique Step by Step
Chisel Angle
Hold the chisel bit at 30–45 degrees to the wall surface — never perpendicular. When the chisel is perpendicular, all impact energy drives directly into the substrate. On soft Victorian brickwork, that energy has nowhere to go except into the brick face, causing spalling and surface pitting that cannot be repaired without repointing.
At 30–45 degrees, the impact travels laterally through the plaster layer, breaking its bond with the brickwork rather than driving through it. You will feel the difference immediately: at the correct angle the plaster comes away in chunks; too steep and the chisel is skipping off brick.
Drill Mode Setting
Set your SDS drill to chipping mode only — not rotation-plus-percussion. In rotation mode the bit skates across the surface and cuts into whatever it contacts, including brickwork. In chipping mode, impact is purely lateral.
Working Direction
Always start at the top and work downward in horizontal bands of approximately 30cm.
Why Top-Down
Debris from higher sections falls onto areas you have not yet worked. Starting at the bottom means every subsequent pass from above rains chunks onto the section you have already cleared. Top-down keeps your work area clean and debris falling clear.
Section-by-Section Inspection
Once each horizontal band is cleared, inspect the exposed brickwork before moving down. If you see cracks, crumbling mortar joints, or moving bricks, stop and assess. Proceeding over a structurally uncertain section with an SDS drill is how minor damage becomes a significant repair bill.
Removing Stubborn Plaster Bonded to Brick
Some sections — particularly sand-cement render applied directly to brick in post-1950 properties — form a bond that resists the SDS chisel. Try these approaches in order.
Reduce Impact Setting
Lower the drill’s impact level to its minimum and slow your pass speed. High impact on bonded render does not break it faster — it increases the risk of the chisel skating onto brick.
Score the Surface First
Use a sharp knife or scraper to score the plaster in a cross-hatch pattern before applying the drill. This gives the chisel edges to work into and breaks the surface tension of the render layer.
Work the Edges, Not the Centre
For patches that still won’t yield, apply the bolster chisel manually at the very edge of the stubborn section. Plaster breaks from its edges inward; driving force into the centre pushes it harder against the brick.
When to Accept Residue
If none of the above works, the render has formed a mechanical key into the brick’s surface pores. A drill-mounted wire brush at low speed can remove visible residue without risking the brick face. A thin skim of render residue is preferable to a gouged brick.
What to Do When Mortar Crumbles Out
Stop, assess the scale, and do not continue removing plaster until you understand what you are dealing with.
The Durham Lime Mortar Problem
Durham has a high concentration of pre-1920 terraced properties — particularly in Gilesgate, Framwellgate Moor, and Belmont — where walls were built with lime mortar. Our team at Plasterers Durham sees significant mortar failure on roughly 1 in 3 plaster strip jobs we quote in the city. Over a century of age, lime mortar loses cohesion; when the plaster covering it is removed, the mortar in the joints comes with it.
Minor Joint Loss
If you are losing mortar from individual joints — a handful here and there — you can continue removal carefully and repoint those joints once the wall is stripped.
The Right Repointing Mortar
Use a lime-compatible mix — NHL 2 or NHL 3.5 natural hydraulic lime — not a modern sand-cement mix, which is too rigid for old brickwork and will cause the surrounding brick faces to crack over time.
Significant Mortar Loss
If entire sections of mortar are dropping out, or bricks are moving as you work, stop completely. You may be dealing with a wall where the plaster was structurally integral. This is not a situation for DIY repair.
Not sure whether your Durham property has lime mortar? Call Plasterers Durham or contact for a free assessment before you start work.
Cleaning Exposed Brickwork After Plaster Removal
Once the plaster is off and mortar repairs are complete, cleaning exposed brick is a three-stage process.
Stage 1 — Dry Brushing
Use a stiff hand brush or drill-mounted wire brush at low speed to remove loose dust and debris from brick faces and mortar joints. Work top to bottom. Run a HEPA-filter vacuum alongside to catch debris as you brush.
Stage 2 — Detergent Wash
Mix a mild detergent (washing-up liquid works; HG Brick Cleaner or Lithofin KF Stone & Facade Cleaner is better) with warm water. Apply generously with a sponge or soft brush. Leave on the brickwork for 5–10 minutes — this dwell time is what loosens calcium deposits and fine plaster residue that dry brushing leaves behind. Do not let it dry on the wall.
Stage 3 — Rinse and Dry
Wipe down with a clean damp sponge, rinsing it frequently. For larger walls, a garden pump sprayer with clean water followed by sponge wipes is efficient. Allow the wall to dry completely — at least 48 hours in a ventilated room — before applying any sealant, paint, or new plaster.
A Note on Acid Washing
Dilute hydrochloric acid is sometimes recommended for removing lime residue. It works, but it requires full chemical PPE, must be neutralised with a bicarbonate wash, and can etch softer brick faces if left too long. For most residential projects the detergent method above is sufficient and far safer.
When to Hire a Professional Plasterer
There are five situations where DIY plaster removal should stop and a professional should be called.
1. Pre-1980 Property, Untested for Asbestos
Non-negotiable. A UKAS-accredited test lab or licensed asbestos surveyor is the only way to confirm safety before starting.
2. Significant Mortar Crumbling
Lime mortar failure during plaster removal can indicate a structurally compromised wall. A qualified plasterer or surveyor must assess before work continues.
3. Active Damp Behind the Plaster
Removing plaster from a damp wall without treating the source first exposes efflorescence, salt contamination, and potentially friable brick. Damp must be diagnosed and treated before any replastering.
4. Large-Scale Strip
More than one room, or a full house strip, compounds the risk of cumulative brick damage significantly. A professional team will complete a whole-house strip in one to two days; DIY at that scale typically takes weeks.
5. You Want a High-Quality Replaster Immediately After
If you are hiring a plasterer to re-skim once the plaster is off, it almost always makes sense to have them do the strip too. They will assess wall condition as they go, address substrate problems immediately, and guarantee the finish. Stripping yourself to save on labour can cost more when the plasterer then has to repair DIY damage before their work can begin.
Key Takeaways for Safe Plaster Removal
- Chisel at 30–45 degrees — never perpendicular.
- Test for asbestos before any removal in a pre-1980 property.
- Work top to bottom in 30cm horizontal bands.
- In pre-1920 Durham terraces, lime mortar crumbling means stop and call a professional.
- One room = 50–150kg of rubble — arrange disposal before you start.
- Clean exposed brick with detergent, 5–10 minute dwell, then rinse.